Last Updated on June 18, 2025
Yes, you can nail shiplap into drywall. Shiplap is suitable to install on drywall, provided you use the right installation techniques and the appropriate materials.
Shiplap paneling is commonly used to enhance the look of interior walls, and it can give your home an elegant and rustic look. However, installing shiplap on drywall requires specific tools and skills beyond that of a standard diy project. Before installing shiplap on drywall, you may need to remove the drywall’s existing texture and apply a primer to ensure proper adhesion. This article highlights some essential guidelines and tips on how to nail shiplap into drywall, offering insights into the installation process while ensuring your wall looks incredible.
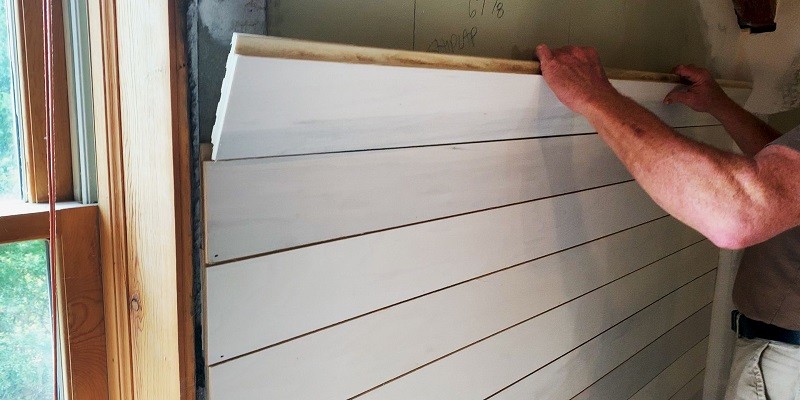
Credit: www.youtube.com
Understanding Shiplap
Shiplap is a type of wooden board that has a rabbet on the top and bottom of each board. This design allows each board to overlap the one below it. Shiplap is made from various materials such as pine, cedar, and fir.
The most popular types of shiplap materials tend to be pine or cedar. The applications for shiplap are endless, from walls, ceilings, and accent pieces. Shiplap is often used to create a rustic or farmhouse style in homes. When it comes to nailing shiplap into drywall, it’s essential to make sure the drywall is thick enough and attach furring strips for extra support.
Understanding the basics of shiplap is the first step to nailing shiplap into drywall.
Preparing Your Drywall For Shiplap Installation
Before installing shiplap on drywall, it’s important to evaluate its condition. Look for any damage or cracks, and repair them before installation to ensure the best results. Additionally, clean the drywall surface to remove any dust or debris. When preparing the drywall, use spackle or joint compound to fill in any holes or gaps.
Sand the surface until it’s smooth before wiping it down with a damp cloth. This ensures that the shiplap adheres to the drywall correctly. Following these simple tips will help you prepare your drywall before installing shiplap for a durable and lasting finish.
Determining Placement And Layout For Shiplap
Shiplap is a sought-after style for walls, but the challenge is nailing it to drywall. Determining the placement and layout is essential for success. Choosing the proper placement requires identifying the best wall location to feature shiplap. Measuring and marking your wall help to avoid mistakes during the installation process.
Installing a level starter strip is also critical to ensure the shiplap lays flat. This method allows you to start with a level strip, which serves as a guide for the other planks. With the right approach and careful planning, nailing shiplap into drywall is possible.
Consider all options, and before you know it, you’ll have a beautiful shiplap wall that enhances your home’s look.
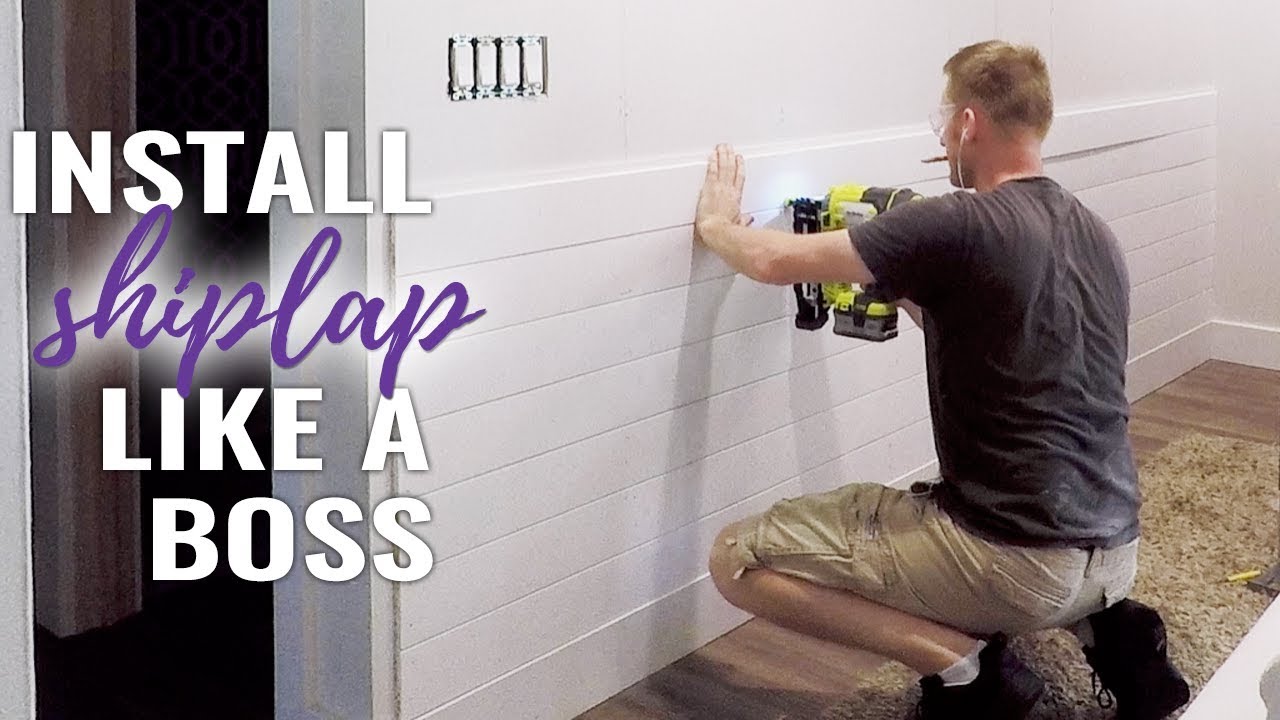
Nailing Shiplap On Drywall
Nailing shiplap on drywall starts with selecting the right method: nailing or gluing. While nailing is the most popular method, gluing offers a smoother finish. The type of nail used, such as a finish or brad nail, also affects the outcome.
When nailing shiplap to drywall, it is crucial to start with a level baseboard and work upwards. Positioning the first board with precision paves the way for the rest of the installation. Use a level to ensure the boards are straight as you nail along the studs.
Remember to space out the boards uniformly with a nickel for the ideal shiplap look. With these simple steps, shiplap can be nailed onto drywall accurately without any complications.
Finishing The Shiplap Installation
After installing shiplap on drywall, you may have gaps and holes. Use wood filler to make repairs and smooth out the surface. Caulk and seal any joints or edges to ensure a water-tight finish. If you plan to paint, use a primer before applying a coat of paint.
Alternatively, you can opt for a natural wood finish by staining the shiplap. With these steps, your shiplap installation will look stunning and flawless, adding a touch of cozy charm to any room.
Maintenance Of Shiplap On Drywall
Shiplap is a popular choice for wall coverings. However, it requires maintenance on drywall to keep it looking great. Cleaning it is easy with a mix of water and mild soap. Inspect it every few months for damages or signs of wear.
Repairs are straightforward; remove any damaged boards and replace them. Reversing course can be a bit challenging but not impossible. Regular upkeep and inspections will prevent any small issues from turning into bigger ones. Your shiplap will continue to look great for years to come with some simple maintenance.
Conclusion
Shiplap is a popular design trend for interior walls, and many people wonder if they can install it on drywall. While it is possible to nail shiplap onto drywall, there are some pros and cons to consider. One of the pros is that it is a relatively inexpensive way to update the look of a room.
The cons include the fact that it can be difficult to achieve a seamless look and that it may not be as durable as other wall options. Ultimately, whether or not to install shiplap on drywall depends on personal preference and budget.
It is important to carefully weigh the pros and cons before making a decision. Overall, if installed properly, shiplap can be a stylish and attractive addition to any room.
Frequently Asked Questions For Can You Nail Shiplap Into Drywall?
What Is Shiplap And What Is It Used For?
Shiplap is a type of wooden board used for decorating walls or ceilings. It is a popular choice for creating a rustic or farmhouse style look in homes. The boards are installed horizontally, with a small gap between each piece, creating a distinctive pattern.
It is typically made of pine or cedar.
Can Shiplap Be Installed Directly Onto Drywall?
Yes, shiplap can be installed directly onto drywall. However, it is recommended to add a layer of plywood or oriented strand board (osb) between the shiplap and drywall for added support and stability. Additionally, it is important to ensure the drywall underneath is smooth, clean, and free of any imperfections before installation.
What Tools Are Needed For Installing Shiplap Onto Drywall?
To install shiplap onto drywall, you will need a circular saw, level, measuring tape, pencil, adhesive, finishing nails, caulking gun, painter’s tape, and sandpaper. Optional tools include a nail gun, stud finder, and sawhorses. It’s important to measure accurately, use adhesive to secure the shiplap, and fill in any gaps or holes with caulk before painting.
What Is The Best Type Of Shiplap To Use For Drywall Installation?
The best type of shiplap to use for drywall installation is typically made from cedar or pine. Both are durable and have a natural resistance to moisture. It’s important to choose shiplap with smooth edges to prevent any gaps or unevenness in the drywall surface.
Will Nailing Shiplap Into Drywall Cause Damage To The Drywall?
Yes, nailing shiplap into drywall can cause damage to the drywall. It may result in cracks or holes, especially if the shiplap is too heavy. Using adhesives or screws instead of nails can be a better option for preventing damage to the drywall.
Can Shiplap Be Installed As A Temporary Solution Without Permanently Damaging The Drywall?
Yes, shiplap can be installed as a temporary solution without permanently damaging the drywall. However, you need to use a floating installation method to avoid creating any permanent damage, such as nailing or gluing the shiplap directly onto the drywall.
Using a floating installation method allows the shiplap to be removed without leaving any significant damage to the drywall.
Conclusion
In all honesty, nailing shiplap into drywall isn’t the ideal method for installation. It can compromise the integrity of your walls, leaving you with a swaying shiplap finish that’s anything but professional. While some homeowners may attempt to do so to save time and money, it’s essential to invest in the proper tools and methods for a successful installation.
From using adhesive to securing furring strips to your wall, there are several ways to ensure your shiplap stays put. It’s essential to plan and coordinate with a professional to make sure your installation is done right the first time, so you don’t have to worry about any potential damage to your walls or shiplap boards.
Now that you have a better understanding of the shiplap installation process, you’re better equipped to make informed decisions about your next home renovation project and achieve a beautiful shiplap finish without the hassle.
