Last Updated on June 18, 2025
To use nail foil transfer sheets, apply a base coat, wait until dry, apply nail foil adhesive, wait for it to become tacky, press the nail foil onto the nail, and then peel off. Nail foil transfer sheets are a fun and easy way to add some glitter and metallic designs to your nails.
In just a few simple steps, you can create unique and stunning nail art that will make your nails stand out. Nail foils come in a variety of colors and designs, so you can choose the perfect one to match your style and personality. Whether you are a nail art beginner or an expert, nail foil transfer sheets are a great addition to your nail art toolkit.
Credit: www.uptowngirl.com
What Is Nail Foil Transfer Sheets?
Nail foil transfer sheets are an innovative way to add a creative touch to your nail art. These sheets come in various colors and designs that can be transferred onto your nails, giving them a unique and stylish look. In simple terms, nail foil transfer sheets are thin, metallic paper-like sheets that are applied to your nails using a special adhesive.
They can also be used with gel polish, creating a gorgeous effect that’s sure to turn heads. There are two types of nail foil transfer sheets – patterned and holographic. Patterned sheets come in an array of designs, while holographic sheets produce a mesmerizing prism-like effect.
Whether you’re a professional nail artist or a beginner, using nail foil transfer sheets is a fun and easy way to upgrade your nail game.
Tools And Techniques
Using nail foil transfer sheets to create intricate designs and patterns on your nails is easier than it seems. The tools required for using nail foil transfer sheets include a base coat, top coat, nail polish, and foil glue. Start by applying your base coat and nail polish.
Allow it to dry and then apply the foil glue to your nails. Once the glue goes tacky (about 2-4 minutes), place the foil transfer sheet over your nail and gently press it down. Then, peel the foil gently off and finish with a top coat.
The techniques for using nail foil transfer sheets include experimenting with different colors and designs and ensuring that the transfer sheet is smooth and not wrinkled. Tips for a perfect finish include applying a thin layer of foil glue and using a cotton swab to remove any excess glue.
With a little practice and patience, you’ll be creating beautiful nail art designs in no time.
Prepping Your Nails
Prepping your nails for using nail foil transfer sheets is essential to achieving lasting and gorgeous results. First, clean your nails with acetone-based nail polish remover to eliminate any oils or residue. Once dry, apply a base coat to uphold the nail polish and prevent damage.
Select your desired nail foil design and cut it to the size of your nail. Apply a layer of adhesive to your nail and let it dry completely. Then, carefully lay the nail foil onto your nail and press it down using firm pressure to eliminate any air pockets.
Once the foil is firmly affixed, gradually peel it off to expose the beautiful design. Seal it with a top coat to prolong its durability and maintain a glossy finish.
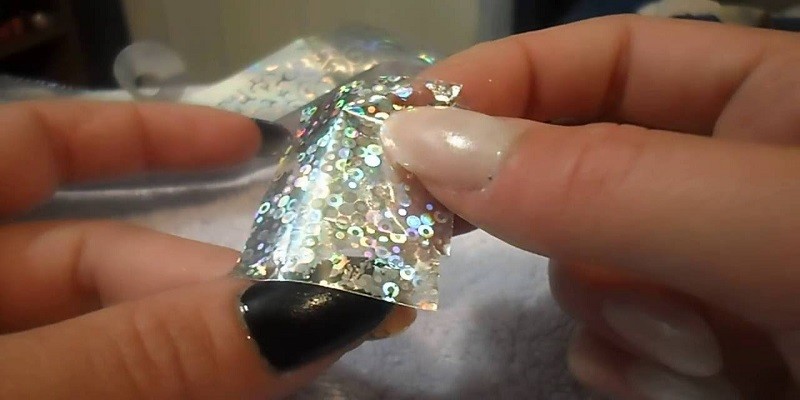
Applying Nail Foil Transfer Sheets
Using nail foil transfer sheets is an easy way to add some glam to your nails. Follow these steps: firstly, pick a base color and apply it to your nails. Cut the foil to the desired shape and size. Apply adhesive to your nails and wait for it to dry.
Place the foil onto the sticky nail and press firmly. Remove the foil slowly and trim any excess. Use a topcoat to seal the design. Common mistakes to avoid: applying too much adhesive, not waiting for it to dry, using old or dried-out foil, and applying too much pressure when removing the foil.
With these tips in mind, you’ll be able to create the perfect nail design with foil transfer sheets.
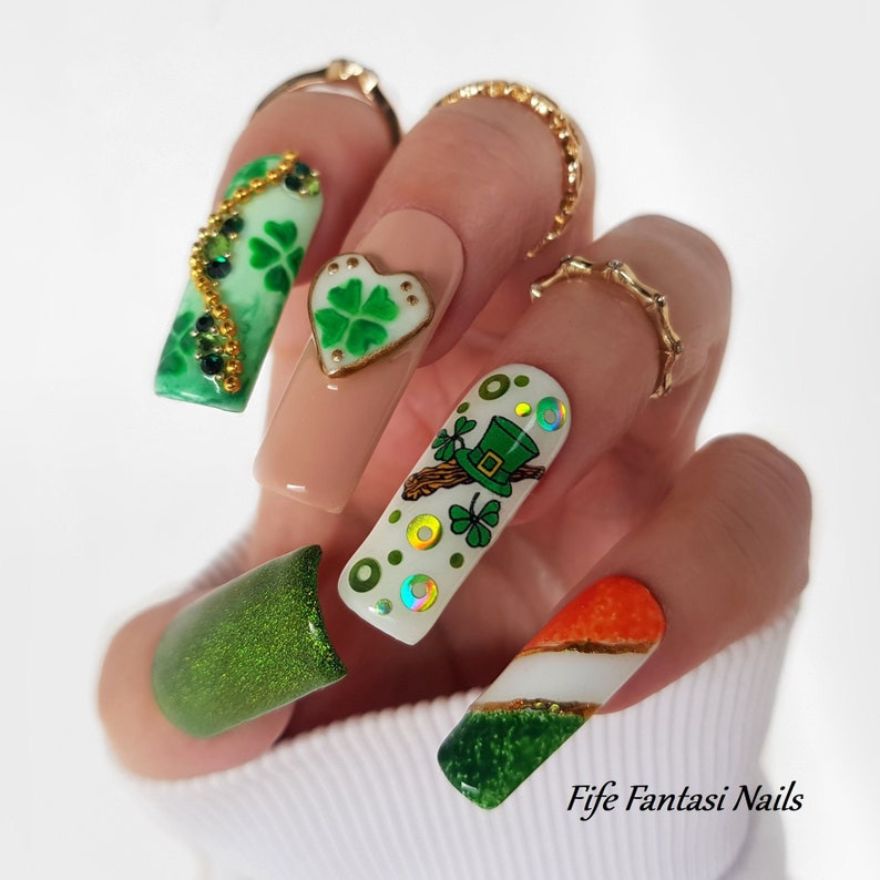
Design Inspiration
Nail foil transfer sheets can help you achieve a unique and dazzling design for your nails. There are various designs and patterns you can try with these sheets. Try the trending marble design, animal prints, or geometric shapes. You can also experiment with different color combinations.
For instance, a gold foil on black polish can make you stand out of the crowd. Moreover, you can also layer different foil sheets to create a mesmerizing effect. Finally, using a topcoat to seal the design is crucial to ensure long-lasting wear.
With these ideas in mind, you can now create your own nail foil transfer sheet masterpiece!
Removal And Maintenance
Nail foil transfer sheets add a unique touch to any diy nail art. However, removal can be challenging. To remove, soak a cotton ball in acetone and place it on top of the nail. Wrap it in foil and leave it for 5-10 minutes.
Gently scrape off the foil and transfer sheet with an orange stick. After your nails are clean, generously moisturize your nails and cuticles to prevent dryness. To make your nail art last longer, avoid exposing your nails to soap or hot water right after the application process.
Also, use a top coat to secure the transfer sheet to the nails. By following these simple steps, you can keep your nail foil transfer art looking fabulous!
Conclusion
Using nail foil transfer sheets can add a new level of creativity to your nail art designs. Whether you are a beginner or an experienced nail artist, these sheets are easy to use and can give your nails a professional look.
Final thoughts on using nail foil transfer sheets are that it’s important to choose the right adhesive, clean your nails properly before applying the sheets, and always follow the instructions carefully. With a little practice and patience, you can create stunning nail art that will wow your friends and family.
So next time you want to switch up your nail game, give nail foil transfer sheets a try and see how it can elevate your nail art experience.
Frequently Asked Questions On How To Use Nail Foil Transfer Sheets?
What Are Nail Foil Transfer Sheets, And How Do They Work?
Nail foil transfer sheets are thin adhesive stickers with shiny metallic designs. To use, apply a base coat, let dry, and apply a clear transfer gel. Cut the foil to size, press the design onto the gel, and remove the backing sheet to reveal the shiny design.
What Materials Do I Need To Use Nail Foil Transfer Sheets?
To use nail foil transfer sheets, you will need: 1. Nail polish 2. Base coat 3. Foil adhesive or glue 4. Nail foils 5. Scissors 6. Topcoat. Place the transfer sheet face down on your nail and press firmly. Peel off the sheet to reveal your design.
Can I Use Nail Foil Transfer Sheets On Natural Nails, Or Do I Need To Be Wearing Acrylic Or Gel Nails?
Nail foil transfer sheets can be used on natural nails without the need for acrylic or gel nails. However, it is important to ensure that the nail surface is clean and dry before application. Additionally, it is recommended to use a topcoat to seal the foil and prolong the wear time.
What Designs Can I Create Using Nail Foil Transfer Sheets?
With nail foil transfer sheets, you can create a variety of designs, including metallic, holographic, and multicolored patterns. These sheets are easy to use and can be applied over any color of nail polish or even natural nails for a unique and eye-catching look.
Do I Need Nail Art Skills Or Experience To Use Nail Foil Transfer Sheets?
No, you don’t need any prior skills or experience to use nail foil transfer sheets. The process is simple and straightforward, and the results can be stunning. Just make sure to follow the instructions carefully and have all the necessary tools on hand.
How Long Do The Nails Last With Nail Foil Transfer Sheets, And How Do I Remove Them?
Nails with nail foil transfer sheets can last up to two weeks with proper care. To remove them, soak a cotton ball in nail polish remover and let it sit on the nail for a few minutes before gently wiping it off.
Avoid scraping or peeling the foil off to prevent damage to the nail.
Conclusion
To wrap up, nail foil transfer sheets are an incredibly versatile and innovative tool that can help you achieve various eye-catching nail designs. All you need to do is choose your favourite foil, apply it to the nail, and seal it with a topcoat.
You can mix and match different colours, experiment with various patterns, or even create your own unique designs. Whether you’re a professional or a beginner, using nail foil transfer sheets can add a touch of glamour and sophistication to your nails.
With a little bit of practice, you’ll be able to create stunning looks that will leave everyone impressed. So go ahead and give it a try, and watch as your nails become the talk of the town!
