Last Updated on June 18, 2025
To watercolor hair, start by gathering all the supplies you will need such as a bowl of clean water, a brush, and paint or markers that are specifically meant for use on human skin. Then, wet your chosen area with the damp brush. Take some of the paint or marker color onto your brush and gently dab it onto the surface of your hair in small strokes to create an even layer.
To blend colors together more seamlessly using this method, try brushing over previously applied color with another shade to create highlights or shadows throughout. Once finished, rinse off any excess residue from both hands and brush before it dries completely. Leave the design to dry naturally before styling as usual!
- Prepare the canvas: Begin by stretching and priming a piece of watercolor paper on a flat, sturdy surface.
- Sketch out your design: Use a pencil to draw out an outline of the hairstyle you would like to paint onto the primed paper. Erase any unnecessary lines when done sketching for a clean look.
- Paint in sections: Start by painting small sections at a time, using light strokes with your brush and varying lengths of hair as you go along the head shape that you drew earlier. Follow this process until all areas are painted in their respective colors or shades of color desired for each section of hair.
- Add shadows and highlights: Once all sections have been painted in, use lighter shades around certain areas such as near roots or parts that should appear highlighted while also adding darker tones where necessary to create texture and depth within your painting (around ears).
- Finish it off: Allow the painting to dry completely before framing or displaying it proudly!
How to Water Dye a Wig Without Staining the Lace?
Water dyeing a wig is a great way to get the perfect color without risking staining the lace. To do this, you’ll need some water-soluble fabric dye, an old towel and a bowl or sink filled with warm water. Start by wetting your wig in warm water and then wringing out any excess liquid.
Once it’s damp, apply the dye directly onto the hair using either your hands or a sponge brush before submerging it into the bowl of warm water for about 20 minutes. Afterward, rinse off any remaining dye until the water runs clear before gently patting dry with an old towel – taking care not to rub at any of its delicate fibers!

Credit: www.pinterest.com
Do You Watercolor Hair With Hot Or Cold Water?
When it comes to watercolor hair, the debate between hot and cold water can be a tricky one. Hot water is often seen as advantageous because of its ability to open up cuticles and allow for better absorption of color, but it also has some potential drawbacks that could make using cold water more ideal. Cold water, on the other hand, can help seal in the pigment and provide a longer lasting look without risking over-processing or damage to your hair.
So when deciding whether you should use hot or cold water for your hair color project, there are some key points you’ll want to consider beforehand.
Hot Water: Using hot water for coloring your hair may seem like a good idea at first glance since heat opens up the cuticle layer which allows better absorption of dye molecules into the cortex where permanent color changes occur. However, too much heat can be damaging by causing dehydration in your strands while leaving them brittle and prone to breakage afterwards.
This makes hot water really only beneficial if used sparingly so as not to overprocess or cause any serious damage down the line – making this option best suited for those looking for fast results with minimal risk involved.
Cold Water: Coldwater provides many benefits that don’t come with using hotter temperatures during your colored process; most notably being that it helps close off each strand’s cuticle layer after coloring which in turn seals in all applied pigments providing longer lasting results than what would otherwise have been achieved with warmer temperatures alone! Additionally – due to its lower temperature – coldwater poses less risk of dehydrating strands or causing excessive damage from overheating; meaning you’re likely able get away with applying multiple treatments (like toners) without worrying about overdoing it on processing time either!
All these factors combined make this an ideal choice for those wanting both long-lasting results alongside minimal risks associated with their chosen hairstyle maintenance routine!
How Long Should You Water Dye Your Hair?
If you’re looking to try out water dye for your hair, the key question is how long should you keep it in? The answer depends on a few factors: the type of dye and color you’re using, as well as the current condition of your hair. Generally speaking, lighter colors require less time than darker colors—but no matter what hue you choose, it’s important to follow instructions carefully.
Most dyes need at least 20 minutes to set properly; if you leave them in any longer than that (unless otherwise noted), they can begin to damage your hair by drying it out or causing fading after multiple washes. Alternatively, semi-permanent dyes don’t penetrate the cuticle layer of your strands like permanent dyes do and usually take about 15 minutes before rinsing out completely. Ultimately, regardless of which product or shade you use for water dyeing your hair, be sure to read directions closely and stick with recommended times in order to get beautiful results without compromising the health of your locks!
How Do You Watercolor Jet Black Hair?
Watercoloring jet black hair can be a daunting task for many people, especially those with dark complexions. However, it is possible to achieve a beautiful watercolor look if you take the right steps. Before beginning your project, make sure you have all of the necessary supplies on hand including: an applicator brush and cup, professional-grade semi-permanent dye in several shades (ideally grey or light brown), developer lotion, aluminum foil squares cut into thin strips (to separate sections of hair before applying color) and gloves.
When you’re ready to start coloring your hair, begin by dividing it up into small sections using the aluminum foil strips. Wet each section thoroughly with warm water before applying any product. Then use your applicator brush to apply the semi-permanent dye onto one piece at a time starting from root level down towards the ends.
Follow this step by adding some developer lotion over top which will help activate and seal in the color molecules within that particular area of hair. Once completed repeat these steps until every strand has been colored accordingly leaving no room for missed spots or unevenness throughout! Finally let your newly dyed locks air dry completely before styling as normal afterwards – voila!
Can You Do the Water Dye Method on Wet Hair?
The water dye method is a great way to get vibrant color on your hair without the use of harsh chemicals or heavy dyes. While this technique generally works best on dry hair, it can also be done on wet hair with a few modifications. To do the water dye method on wet hair, you’ll need to start by dampening it slightly so that the dye has some moisture to work with.
It’s important not to overdo it though; if your hair is too wet, the dye won’t penetrate properly and will likely wash out quickly. Next, divide your hair into sections and begin applying the dye in small amounts using either a brush or comb. Start at the roots and work your way down until all of your strands are evenly coated in color.
Once finished, let your dyed strands air dry completely before styling as usual. If done correctly, you should get beautiful results that last much longer than other methods of coloring!
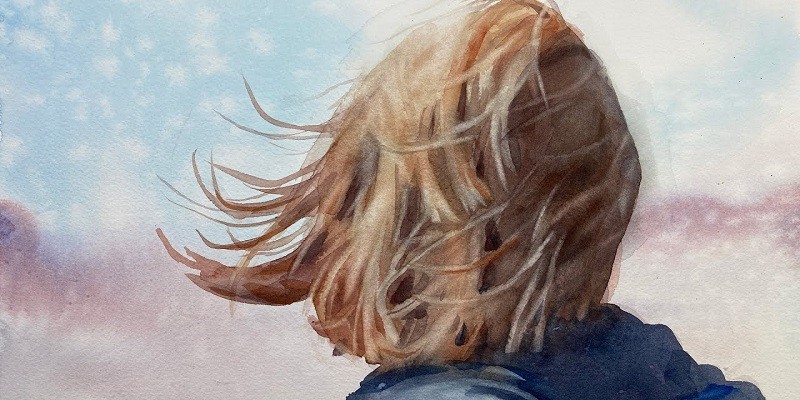
How to Paint Hair with Watercolor
Conclusion
This blog post has provided an excellent overview of how to paint hair with watercolors. From understanding the basics of color and technique, to creating a unique style for your subject, you now have all the tools necessary to make beautiful watercolor portraits. With practice and patience, you can master this art form and create stunning works that will last a lifetime!
