Last Updated on June 18, 2025
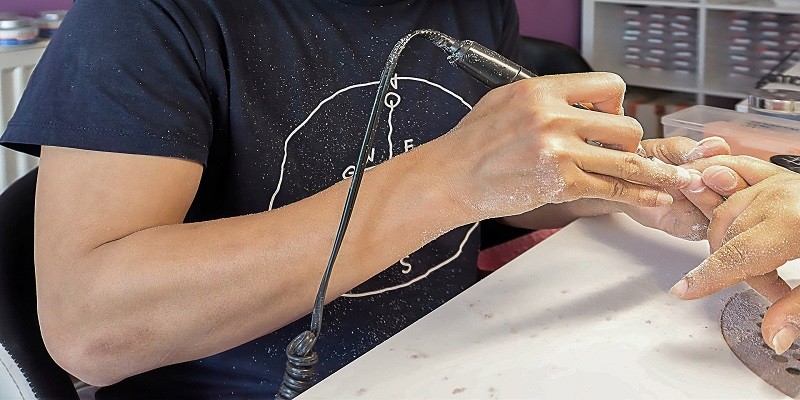
Using nail forms with builder gel is easy and requires a set of simple steps. First, prepare the natural nails by cleaning, filing and shaping them to your preference.
Use gel base coat on each nail and apply the nail form. Next, apply the builder gel on the form, beading it in the center of the nail and spreading it towards the sides. Cure under the uv lamp and remove the form. Use a file to smooth the edges and add a topcoat to finish. Nail forms are an essential tool for creating stunning nail art. They are used to shape, lengthen, and strengthen nails, helping to create a perfect canvas for any design. Builder gel is perfect for adding extra thickness and durability to your natural nails. Using nail forms with builder gel is fast, easy, and an excellent choice for anyone looking to create beautiful nails that last. Whether you are a beginner or an experienced nail artist, this simple guide will help you get started with this innovative method.

Credit: bonesandlilies.blogspot.com
Understanding Nail Forms And Builder Gel
Using nail forms with builder gel is the perfect way to create a beautiful and durable set of nails. In order to get started, it’s important to know what nail forms are. These are essentially stickers that help form the desired shape of the nail.
There are various sizes and shapes available to suit different nail shapes. Builder gel is a type of nail gel that is used to create a firm foundation for the nail form. It is applied to the nail and cured using a uv light, which hardens it into a solid surface.
This base acts as a foundation for the creation of a range of different nail designs. With nail forms, builder gel, and a little creativity, the options are endless. Experiment with your favorite colors and designs to create stunning, long-lasting nails that will surely turn heads.
Preparing Your Nails For Builder Gel And Nail Forms
Before preparing your nails for builder gel and nail forms, ensure they are clean and sanitized. Use a nail brush and soap to wash your nails, then dry them thoroughly. Shaping the nails is also important to prepare it for the nail forms, file it to the desired shape.
Once your nails are clean and shaped, you can apply a base coat to protect your natural nails. Allow it to dry before beginning the next step. Proper preparation of your nails is key to achieving a flawless finish with builder gel and nail forms.
Applying Nail Forms
When applying nail forms with builder gel, the first step is to place the form on your nail. Make sure it is secure before applying the gel. Use the builder gel to create the apex of the nail, which will give it strength and shape.
Work with precision to achieve the desired results. Finally, secure the nail form firmly in place to ensure the perfect shape. It’s important to follow these steps carefully to achieve salon-quality results at home. With a little practice, using nail forms with builder gel will become second nature.
Applying Builder Gel
When it comes to applying builder gel with nail forms, it’s important to select the right gel for your project. Prepare the builder gel by mixing it thoroughly and applying a thin layer of bonder to the natural nail. Once the bonder is dry, apply a thin layer of builder gel to the nail form, making sure to spread it evenly.
Place the nail form on the natural nail, pressing it down firmly to ensure a snug fit. Begin building the nail by applying more builder gel, being careful not to let it touch the skin. Once the nail is built to the desired length and shape, cure it under a uv lamp according to the instructions for the specific gel being used.
Curing The Builder Gel
Curing builder gel with nail forms requires an understanding of curing times and methods. Uv or led lights can be used to cure the gel, but it’s important to ensure it’s fully cured before proceeding. To cure the gel, apply a thin coat and cure for the recommended time.
Repeat for additional layers. Test the gel’s hardness by tapping it with a tool. If it’s sticky, cure for a bit longer. Once the gel is fully cured, it will create a strong base for the nail extension. With practice, using nail forms and builder gel can create a beautiful and durable nail.
Shaping And Filing The Nail
Shaping and filing the nail is an essential part of using nail forms with builder gel. Start by shaping the nail with a nail file, keeping the nail’s natural shape. Then, use a buffer to smooth out the nail surface, removing any ridges or bumps.
Creating a smooth, even surface is key to getting the most out of your builder gel and achieving a flawless look. Be careful not to over-file or buff the nail, as this can weaken it. With a little bit of practice, you’ll be able to shape and file your nails like a pro, creating the perfect base for your manicures.
Keep in mind that proper preparation is the key to a long-lasting and flawless gel manicure.
Applying Top Coat And Finishing
After applying builder gel and shaping your nails, the next step is to apply a top coat to protect the nail. This will prevent chipping and increase durability. Once the top coat has dried, you can add additional designs or embellishments.
Be sure to let each layer dry completely before adding more. After you’ve finished your design, it’s important to take proper care of your nails. Moisturize daily and avoid exposing your nails to harsh chemicals or excessive heat. By following these steps, you can create beautiful, long-lasting nails using nail forms with builder gel.
Frequently Asked Questions On How To Use Nail Forms With Builder Gel?
Faqs On How To Use Nail Forms With Builder Gel?
### 1. What are nail forms, and how do they work with builder gel? Nail forms are disposable templates that help shape and extend the nails. They work with builder gel by providing a guide for creating a nail extension that adheres to the natural nail.
2. How Do You Prepare Your Nails Before Using Nail Forms With Builder Gel?
First, clean your nails, shape them with a file, and push back cuticles. Then, apply a base coat and allow it to dry. Finally, select the appropriate nail form size and secure it onto your fingertip.
3. What Type Of Builder Gel Should You Use With Nail Forms?
A self-leveling, medium-to-thick viscosity builder gel is recommended. This type of builder gel allows for easier application and shape retention of the nail extension.
4. How Do You Apply The Builder Gel Onto The Nail Forms?
Start by applying a thin layer of the builder gel onto the nail form, making sure to cover the entire template surface. Then, place the nail onto the template and hold it in place until the gel hardens.
5. How Do You Shape And Cure The Builder Gel Nail Extension?
After removing the nail form, shape the nail extension to your desired length and style using a file. Then, cure the nail extension in a uv or led lamp according to the manufacturer’s instructions.
Conclusion
Using nail forms with builder gel can be a great way to achieve professional-looking nails at home. With the right tools and techniques, anyone can master the process and create a flawless finish. It’s important to start with a clean and dry nail bed, properly size the nail form, and apply the builder gel in thin layers to avoid any lumps or bumps.
Remember that practice makes perfect, so don’t be discouraged if your first few attempts don’t turn out perfectly. Experiment with different colors and designs to create unique and personalized nail looks. By following the steps outlined in this post and taking care to properly prep and maintain your nails, you can enjoy beautiful, long-lasting results.
Whether you’re a beginner or a seasoned pro, using nail forms with builder gel is a great way to elevate your at-home nail game.
