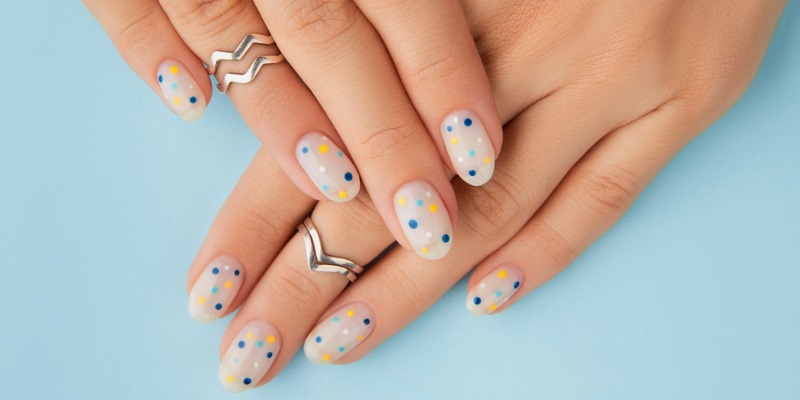
Last Updated on January 14, 2026
ASP Nail Builder Curing Gel is not just a tool for creating durable and strong nails—it’s also a canvas for unleashing your creativity. With its smooth application and compatibility with various nail art accessories, you can achieve stunning, salon-worthy designs right at home. In this article, we’ll explore a variety of DIY nail art ideas that are perfect for beginners and pros alike, along with step-by-step instructions to help you get started.
Why Use ASP Nail Builder Curing Gel for Nail Art?
ASP Nail Builder Curing Gel is an ideal choice for nail art because of its unique properties:
- Strength and Durability: It forms a sturdy base, ensuring that intricate designs stay intact longer.
- Smooth Application: Creates an even surface that enhances precision for detailed designs.
- Versatility: Works well with gel polish, glitter, decals, and more, making it a go-to product for creative nail art.
- Cost-Effective: Achieve professional-looking results without the salon price tag.
Tools and Supplies You’ll Need
To get started, you’ll need the following tools and accessories:
Basic Tools
- Nail Buffer and File: For shaping and smoothing the nail surface.
- Cuticle Pusher: To prep the nail bed.
- Builder Gel and Gel Brush: For creating the base and extensions.
- LED or UV Lamp: To cure each layer.
Nail Art Accessories
- Gel Polish: In various colors for creative designs.
- Glitter, Rhinestones, and Decals: To add sparkle and embellishments.
- Striping Tape or Stencils: For clean lines and patterns.
- Dotting Tools and Fine Brushes: For detailed work.
Finishing Products
- Primer, Base Coat, and Top Coat: To ensure longevity and a polished finish.
- Cuticle Oil: To keep nails and skin hydrated post-application.
DIY Nail Art Ideas with Step-by-Step Instructions
1. Classic French Tips
Create an elegant, timeless look with a modern twist.
- Step 1: Shape the nails and apply a thin layer of builder gel as a base. Cure under the lamp.
- Step 2: Paint the tips white or choose a pastel or metallic shade for a trendy update. Cure again.
- Step 3: Seal with a glossy top coat and cure.
2. Glitter Gradient Nails
Add some sparkle with an easy glitter fade.
- Step 1: Apply a layer of builder gel and cure.
- Step 2: Add glitter to the tips, using a brush to blend it toward the cuticle.
- Step 3: Cure and finish with a clear top coat.
3. Marble Effect
Create an elegant marble design with gel polish.
- Step 1: Apply a cured base layer of builder gel.
- Step 2: Swirl two or more colors of gel polish on a blending brush and apply to the nail.
- Step 3: Smooth the design with a thin clear layer before curing. Finish with a glossy or matte top coat.
4. Rhinestone Embellishments
Elevate your manicure with gem-like details.
- Step 1: Prepare a sturdy base with builder gel and cure.
- Step 2: Secure rhinestones using adhesive gel and cure to lock them in place.
- Step 3: Add a protective clear gel layer and cure for added durability.
5. Geometric Patterns
Make a bold statement with sleek lines and shapes.
- Step 1: Use striping tape or stencils to outline shapes on a cured builder gel base.
- Step 2: Fill each section with different colors of gel polish. Cure each color layer before moving to the next.
- Step 3: Seal the design with a top coat and cure.
6. Ombré Nails
Blend colors seamlessly for a gradient effect.
- Step 1: Use a sponge or blending brush to mix two colors of gel polish over a builder gel foundation.
- Step 2: Cure the ombré design under the lamp.
- Step 3: Smooth with a clear top coat and cure again.
7. 3D Nail Art
Take your designs to the next level with sculpted elements.
- Step 1: Use builder gel to sculpt flowers, bows, or other 3D designs. Cure after shaping.
- Step 2: Add details with gel polish and cure thoroughly.
- Step 3: Seal with a protective top coat and cure.
Tips for Perfect DIY Nail Art
- Start Simple: Focus on mastering basic designs before progressing to complex patterns.
- Cure Thoroughly: Ensure each layer is properly cured to avoid smudging or lifting.
- Invest in Quality Tools: High-quality brushes, lamps, and builder gel will make your work easier and more precise.
- Be Patient: Nail art requires time and practice, so don’t rush the process.
Maintenance and Aftercare
- Hydrate Regularly: Apply cuticle oil daily to keep your nails and surrounding skin nourished.
- Protect Your Nails: Avoid harsh chemicals and wear gloves for chores to maintain your manicure.
- Store Supplies Properly: Keep builder gel and accessories in a cool, dry place to ensure they remain in good condition.
Conclusion
DIY nail art with ASP Nail Builder Curing Gel offers endless possibilities for creativity. Whether you prefer classic styles or bold, intricate designs, this product empowers you to achieve professional results at home. By following these ideas and techniques, you can transform your nails into works of art that are as unique as you are. Experiment, practice, and enjoy the process of creating your masterpiece!


