Last Updated on June 18, 2025
To transfer a drawing onto skin without transfer paper, use a stencil or draw directly using a skin-safe pen or marker. Clean the skin and draw the design before carefully outlining it with an ink pen.
By following these steps, you can transfer your desired drawing onto the skin without using transfer paper, ensuring a precise and safe process. Transferring a drawing onto skin without transfer paper can be achieved using simple methods like stencils or drawing directly on the skin with a skin-safe pen.
It’s important to begin with clean skin and carefully outline the design for accurate results. By following these steps, you can confidently transfer your drawing onto the skin without the need for transfer paper, ensuring a precise and safe process.
Alternative Methods For Transferring Drawings Onto Skin
When it comes to transferring a drawing onto skin without transfer paper, there are several alternative methods that you can explore. Whether you’re a tattoo artist wanting to bring your client’s vision to life or a DIY enthusiast looking to create a temporary tattoo for yourself, these techniques can help you achieve the desired effect. In this article, we will explore three popular methods: Freehand Tattoo Transfer Technique, Carbon Tracing Method, and Stencil Gel Transfer Technique.
Freehand Tattoo Transfer Technique
The Freehand Tattoo Transfer Technique is a method that requires a steady hand and an artistic eye. This technique is commonly used by experienced tattoo artists who are skilled in drawing directly onto the skin. While this method may seem daunting for beginners, it offers a high level of creativity and allows for more intricate and detailed designs. If you have confidence in your drawing abilities, this technique can help you achieve a unique and personalized tattoo without the need for transfer paper.
Carbon Tracing Method
The Carbon Tracing Method is a popular and effective way to transfer a drawing onto skin without the use of transfer paper. This method involves using carbon paper or graphite transfer paper to transfer the design onto the skin’s surface. To use this technique, place the carbon paper or graphite transfer paper face down on the skin, with the drawing on top. Apply pressure while tracing over the lines of the drawing with a pen or pencil. The pressure will transfer the design onto the skin, allowing you to then trace over it with tattoo ink or other art mediums.
Stencil Gel Transfer Technique
The Stencil Gel Transfer Technique is another alternative method for transferring drawings onto skin. This technique involves using a stencil gel or transfer gel to transfer the design onto the skin’s surface. Start by applying a thin layer of stencil gel to the area where you want the design. Next, place the drawing face down onto the skin and press firmly. Leave it for a few seconds, and then gently peel off the paper. The design should now be transferred onto the skin. This method provides a clean and precise transfer, making it a popular choice among both beginners and professionals in the tattoo industry.
These alternative methods for transferring drawings onto skin without transfer paper offer flexibility and creativity. Whether you choose to embrace the challenge of freehand drawing, opt for the carbon tracing method, or try out the stencil gel transfer technique, these methods can help you bring your creative ideas to life. Experiment with each technique to find the one that suits your preferences and artistic style. Happy tattooing!

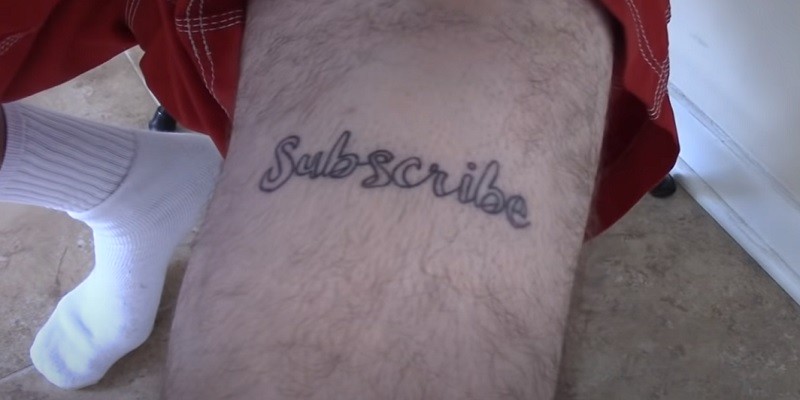
Credit: makeupdrshari.wordpress.com
Step-by-step Guide: Freehand Tattoo Transfer Technique
Gather The Necessary Supplies
Before you start the freehand tattoo transfer process, it’s essential to gather all the necessary supplies. You will need the following:
- Black pen or marker
- Clean paper towel
- Rubbing alcohol
- Clear deodorant or stencil solution
Prepare The Skin And The Drawing
To ensure a successful freehand transfer, it’s crucial to prepare both the skin and the drawing. Follow these steps:
- Clean the skin where you want the tattoo to be placed using rubbing alcohol and a clean paper towel.
- Ensure the drawing is the exact size and design you want for the tattoo.
Start The Transfer Process
Now, it’s time to begin the freehand tattoo transfer process. Here’s how to do it:
- Place the drawing directly onto the clean, dry skin.
- Use a black pen or marker to trace over the lines of the drawing, applying firm and even pressure.
- Gently lift the paper to check if the image has transferred onto the skin.
Refine The Transferred Image
After completing the transfer, take the time to refine the transferred image to ensure clarity and accuracy. Use the following tips:
- If the transferred image is faint, go over the lines again with the pen or marker to darken them.
- Once satisfied with the transferred image, carefully remove any excess ink or marker residue around the design.
Step-by-step Guide: Carbon Tracing Method
Discover a step-by-step guide on using the carbon tracing method to transfer your drawings onto skin without the need for transfer paper. Follow this easy-to-understand process to achieve accurate and professional results in tattoo art.
Gather The Necessary Supplies
Before starting the drawing transfer process, gather the following supplies:
- Carbon paper
- Clean piece of skin where the drawing will be transferred
- Image or drawing to be transferred
- Scissors
- Tape
- Pencil
Prepare The Carbon Paper And The Skin
To prepare for the transfer, follow these steps:
- Cut the carbon paper to the size of the drawing or image.
- Place the carbon paper, graphite side down, onto the clean skin. Secure it in place with tape.
Transfer The Drawing Using Carbon Paper
Now, transfer the drawing using the following steps:
- Place the image or drawing on top of the carbon paper.
- Using a pencil, trace the outlines of the image with firm and even pressure. This will transfer the graphite onto the skin.
- Once the tracing is complete, carefully remove the drawing and the carbon paper from the skin.
Perfecting The Transferred Design
After the tracing, it’s essential to perfect the transferred design:
- Use a clean eraser to gently remove any excess graphite lines or smudges.
- Inspect the transferred design and make any necessary touch-ups.
- Ensure the transferred lines are visible and accurate before proceeding to the next steps of your project.
Step-by-step Guide: Stencil Gel Transfer Technique
To successfully transfer a drawing onto your skin without transfer paper, you will need a few supplies. Make sure you have the following items ready:
- Stencil gel
- Clean skin surface (preferably shaved)
- Design drawing on regular paper
- Scissors
- Disposable gloves
- Fine-tipped marker or pen
- Skin-safe adhesive spray
- Lint-free cloth or paper towel
Once you have gathered all these supplies, you’re ready to prepare the stencil gel and your skin for the transfer process.
Before applying the stencil gel, it is important to clean and prepare the skin properly. Follow these steps:
- Wash the area of skin where you want to transfer the design with mild soap and water. Pat it dry with a clean towel.
- Put on disposable gloves to maintain hygiene throughout the process.
- Print or draw the design you want to transfer onto regular paper. Ensure that the design is the right size for the area of skin you have chosen.
- Carefully cut out the design using scissors, leaving a slight border around it.
- Take the stencil gel and squeeze a small amount onto a clean surface or into a small bowl.
- Using a brush or your finger, apply a thin layer of stencil gel to the surface of the design, ensuring you cover the entire area.
With the preparation complete, you can now move on to the next step of the stencil gel transfer technique.
In this step, you will apply the stencil gel directly to the drawing itself. Follow these instructions:
- Place the cut-out design onto a flat and clean surface.
- Dip your finger or brush into the stencil gel and apply an even layer onto the back side of the design.
- Make sure the stencil gel is evenly spread, paying extra attention to the edges.
- Allow the stencil gel to dry for a few minutes until it becomes tacky.
- Once the stencil gel is tacky, carefully pick up the design, making sure not to smudge the gel.
You have now successfully applied the stencil gel to your design. The next step will guide you through transferring the design onto your skin.
With the stencil gel applied to your design, it’s time to transfer it onto your skin. Follow these final steps:
- Position the design on the desired area of your clean and prepared skin.
- Press the design firmly onto the skin, ensuring it sticks properly.
- Gently peel off the paper, leaving the design with the stencil gel transferred onto your skin.
- Inspect the transferred design to make sure all lines and details are visible.
That’s it! You have successfully transferred your drawing onto your skin without using transfer paper. Remember to follow any aftercare instructions provided by professionals if you plan to permanently ink the design.
Tips And Tricks For Successful Transfers Without Transfer Paper
When it comes to transferring a drawing onto skin without using transfer paper, learning some tips and tricks can make the process much smoother. In this section, we will explore five essential tips that will help you achieve successful transfers without the need for transfer paper. Read on to discover how to choose the right drawing materials, practice your technique, adjust the pressure for desired results, troubleshoot common issues, and provide proper aftercare for long-lasting results.
Choose The Right Drawing Materials
To transfer a drawing onto skin without using transfer paper, it is vital to select the appropriate drawing materials. You will need a smooth, fine-tip pen or marker that can easily create crisp lines on the skin. Make sure the pen or marker is waterproof and safe for use on skin. It’s also helpful to have a reference image or stencil of your design to guide you during the transfer process.
Practice Your Technique
Just like any other skill, transferring drawings onto skin requires practice to achieve precision and accuracy. Before attempting to transfer your design onto the actual skin, it is advisable to practice on a similar surface such as paper or a mannequin. This will allow you to familiarize yourself with the drawing technique and gain confidence in your abilities. Take your time to ensure your lines are smooth and consistent.
Adjusting The Pressure For Desired Results
One of the key factors in achieving successful transfers without transfer paper is adjusting the pressure applied while drawing on the skin. It’s crucial to find the right balance between pressing too hard, which can lead to smudging or discomfort, and applying too little pressure, resulting in faint lines. Experiment with different levels of pressure to find what works best for you and your chosen drawing materials.
Troubleshooting Common Issues
During the transfer process, you may encounter some common issues that can affect the quality of your design. One common problem is ink bleeding, where the lines become blurred or smudged. To prevent this, make sure your pen or marker is not overly saturated with ink and avoid dragging the tip on the skin. Additionally, if you make a mistake, do not panic. You can gently remove the unwanted lines using a cotton swab or a damp cloth before they dry.
Proper Aftercare For Long-lasting Results
After successfully transferring your drawing onto the skin, proper aftercare is crucial to ensure long-lasting results. It’s important to avoid excessive moisture or rubbing in the transferred area for at least 24 hours. Clean the area gently with mild soap and water and pat it dry with a soft towel. Apply a thin layer of fragrance-free moisturizer to keep the skin hydrated and prevent the design from fading. Protect the transferred area from direct sunlight and avoid swimming or exposing it to harsh chemicals until it has fully healed.
Frequently Asked Questions For How To Transfer A Drawing Onto Skin Without Transfer Paper?
How Can I Transfer A Drawing Onto Skin Without Transfer Paper?
You can transfer a drawing onto skin without transfer paper by using other materials such as tracing paper, stencil pencils, or carbon paper.
Can I Use Regular Paper To Transfer A Drawing Onto Skin?
Regular paper is not suitable for transferring a drawing onto skin as it does not have the necessary properties to adhere to the skin like transfer paper or other specialized materials.
What Are Some Alternative Methods To Transfer A Drawing Onto Skin?
Some alternative methods to transfer a drawing onto skin include using tattoo transfer gel, freehand drawing directly onto the skin, or using temporary tattoo paper.
Is It Possible To Transfer A Drawing Onto Skin Without Any Tools?
Yes, it is possible to transfer a drawing onto skin without any tools by carefully sketching the design directly onto the skin with a washable marker or eyeliner pencil, and then tracing over it using tattoo ink.
What Precautions Should I Take When Transferring A Drawing Onto Skin?
When transferring a drawing onto skin, ensure that the area is clean and free from any oils or lotions. Also, be sure to use sterilized tools and follow proper hygiene practices to prevent any infections or adverse reactions.
Conclusion
To conclude, transferring a drawing onto skin without transfer paper may seem challenging, but with the right techniques, it can be accomplished. By using alternative methods like carbon paper, stencil fluid, or freehand tracing, you can bring your artwork to life on your skin.
Remember to proceed with caution, ensuring cleanliness and using non-toxic materials. Experiment, practice, and enjoy the process of creating unique and personalized designs directly on your skin. Happy tattooing!
