Last Updated on June 18, 2025
Balayage is a technique of hair color that gives a natural looking result. The sections for balayage should be chosen carefully to achieve the desired look. To section your hair, start by creating four quadrants with clips on either side of the head, from front to back and top to bottom.
Then create small slices within each quadrant, from ear to ear and parting line to nape. Make sure there is enough space between each section so that you can apply the dye evenly throughout the hair shafts. When applying color, it’s important not to overlap too much in order for your client’s base colour not be affected too much.
Working freehand allows flexibility when painting which will give them more natural results than traditional foils or cap highlights would produce .
- Step 1: Start by washing and conditioning the hair. Use a clarifying shampoo to ensure the hair is free of product buildup.
- Step 2: Part the hair down the center from forehead to neckline so there are two even sections. Clip each section up, leaving only one small piece of hair out on either side for framing around your face.
- Step 3: Section off horizontal chunks of hair beginning at your part line, going all the way back towards your occipital bone (the bump in back at base of skull). Take thin vertical subsections within those larger chunks as you go, making sure they’re consistent in size and shape throughout both sides.
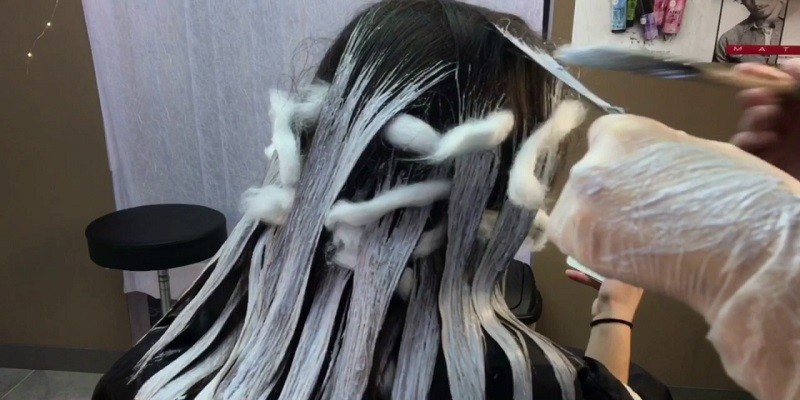
- Step 4: Apply balayage highlights using a sweeping motion with a brush or comb while applying lightener or color directly onto sections of clean dry hair. Make sure to apply more product closer to roots than tips for best results and keep strands separated while painting them individually with the mixture.
- Step 5: Allow time for processing until desired level has been achieved according to manufacturer’s instructions before rinsing thoroughly with cool water followed by an application of toner if necessary.
Easy Balayage Sectioning
Balayage sectioning is an easy and popular technique for creating natural looking highlights on hair. It involves painting the dye onto small sections of dry hair, which allows it to blend seamlessly with your natural color. This gives a beautiful sun-kissed look that can be customized to fit any style!
Balayage sectioning also requires less frequent touch ups than traditional highlighting techniques, making it a great choice for busy individuals who want low maintenance highlights.

Credit: www.pinterest.com
How Thick Should Balayage Sections Be?
When it comes to balayage, the thickness of each section can make a huge difference in the finished look. For example, if you’re going for a more dramatic effect with lots of highlights and lowlights throughout your hair, then you’ll want to take thicker sections when applying color. On the other hand, if your goal is a subtler look with just a few strategic pops of color, then thinner sections are best.
Generally speaking, most stylists recommend taking one-fourth or one-half inch thick sections when performing balayage techniques. This size allows for enough room to create natural looking results without overdoing it and making them appear choppy or overly done. Additionally, be sure that each section is evenly spaced out across your head so that all areas get equal coverage when highlighting or coloring.
If you’re unsure how thick to go when doing your own balayage at home – don’t worry! You can always use clips or pins to divide up larger chunks into smaller pieces before beginning application for an even result every time.
What are 3 Techniques Used in Balayage?
Balayage is a hair coloring technique that can create beautiful, natural looking results. It involves painting the dye onto sections of the hair in order to achieve a sun-kissed, highlighted look. There are three main techniques used when doing balayage: freehanding, foiling and meche.
Freehanding is done by using a brush or other tool to paint colors directly onto the surface of the hair without any form of protection like foil or plastic wrap. Foiling involves dividing strands with pieces of foil before applying color so that each section can be colored separately for more precise results. Finally, meche is similar to foiling but instead of wrapping strands in foil, they are woven into small braids first and then painted over with dye for an even application on all sides.
Each technique has its own advantages and disadvantages depending on what type of look you’re going for, so it’s important to do your research before deciding which one will work best for you!
How to Do a Balayage Step by Step?
If you’re looking to add some dimension and vibrancy to your hair, balayage is the perfect option. Balayage gives a natural-looking sun-kissed effect that looks great on all hair types. Here’s a step by step guide on how to do your own balayage at home:
1. Start by sectioning off the top half of your hair, which will be left untouched during this process. Then use clips or ties to secure it out of the way.
2. Next, create smaller sections in the bottom part of your hair and apply bleach starting from the ends up towards the roots (around 1 cm away).
This will give you a more natural look with subtle highlights that blend into each other nicely. If you want more dramatic results, move closer towards the root area when applying bleach!
3. Once all sections have been bleached, leave them for 10 minutes before rinsing thoroughly with cold water only until all traces of bleach are gone (do not shampoo!).
This is important as shampoo can strip away color and make your balayage look patchy or unevenly blended – yikes!
4 . After rinsing, condition well and blow dry using low heat setting to avoid damaging delicate strands even further; if needed, brush through gently with a wide tooth comb or paddle brush for an even smoother finish.
5 . Finally once dry, you should use special protective products such as thermal sprays or oils designed specifically for bleached locks since they help maintain moisture levels while protecting against environmental factors like pollution & UV rays – saving you time & money later down track!
Where Should Balayage Start From?
When it comes to balayage, the starting point is an important factor in achieving the perfect look. The best place to start your balayage application is at the mid-lengths of your hair. Balayage should be worked from this area outwards towards the ends of your hair as it helps create a more natural-looking result.
This way you can build up lighter pieces gradually and blend them into darker areas, creating a beautiful sun-kissed effect that looks like you’ve been spending lots of time in the sunshine! When applying balayage near or around your face, make sure to keep it light and subtle; too much contrast between dark roots and light ends will not give you that ‘graduated’ finish everyone wants when they get their hair done.
How We Section for Balayage?
Conclusion
This blog post has provided an overview of how to section hair for balayage. From understanding the importance of parting and marking sections, to preparing the hair and applying lightener or dye, you have all the information necessary to create a stunning balayage look. With practice, patience, and the right products you can master this technique in no time!
