Last Updated on June 18, 2025
Achieving a salon-quality gel polish manicure at home requires meticulous preparation of your nails. Proper nail prep ensures that your gel polish adheres well and lasts longer without chipping or peeling. This guide will walk you through the essential steps and tips for prepping your nails for gel polish application.
Why Nail Preparation is Important
Proper nail preparation is crucial for several reasons:
- Longevity: Well-prepped nails help the gel polish adhere better, making your manicure last longer.
- Smooth Application: Prepping your nails ensures a smooth surface, preventing bubbles and uneven application.
- Health: Proper nail care prevents damage and maintains the health of your natural nails.
Tools and Products Needed
Before you start, gather the following tools and products:
- Nail file (100/180 grit)
- Cuticle pusher (metal or wooden)
- Cuticle remover
- Cuticle nippers
- Nail buffer
- Nail cleanser or rubbing alcohol
- Lint-free wipes
- Nail dehydrator (optional)
- Primer (optional)
- Base coat, gel polish, and top coat
- UV or LED lamp
Step-by-Step Guide to Prepping Nails
Step 1: Shape Your Nails
Start by shaping your nails to your desired length and shape using a nail file. Common shapes include round, square, almond, and stiletto. File in one direction to avoid splitting the nails. This step not only gives your nails a neat appearance but also helps in the even application of gel polish.
Step 2: Push Back Cuticles
Apply cuticle remover to soften the cuticles. Wait for about 60 seconds, then gently push back the cuticles using a cuticle pusher. This step is essential as gel polish does not adhere well to the skin, and any leftover cuticle can cause lifting and an uneven finish.
Step 3: Remove Dead Skin
Use cuticle nippers to carefully trim any dead skin around the nail bed. Be cautious not to cut live skin, as this can cause injury. Removing dead skin ensures a clean nail surface for the gel polish to adhere to.
Step 4: Buff the Nails
Buff the surface of your nails using a fine-grit nail buffer. This step creates a slightly rough texture, which helps the gel polish adhere better. Be gentle to avoid over-buffing, which can thin and weaken your nails.
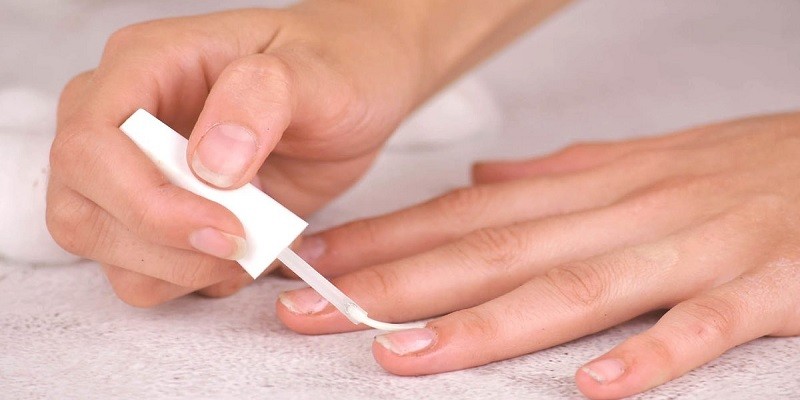
Step 5: Cleanse and Dehydrate the Nails
Clean your nails with a nail cleanser or rubbing alcohol using a lint-free wipe. This step removes any oils, dust, or debris that can prevent the gel polish from adhering properly. For extra adhesion, you can use a nail dehydrator to remove any remaining moisture from the nail surface.
Step 6: Apply Primer (Optional)
If you have oily nails or want to ensure maximum adhesion, apply a primer. An acid-free primer is recommended as it is less harsh on the nails. Allow the primer to air dry completely before proceeding to the next step.
Applying the Gel Polish
Once your nails are prepped, you can proceed with the gel polish application. Here’s a brief overview of the steps:
Step 1: Apply the Base Coat
Apply a thin layer of base coat to each nail, making sure to cap the free edge. This step is crucial as the base coat provides a sticky layer for the gel polish to adhere to. Cure the base coat under a UV or LED lamp according to the manufacturer’s instructions.
Step 2: Apply the Gel Polish
Shake the gel polish bottle to ensure the color is well-mixed. Apply a thin layer of gel polish to each nail, avoiding the cuticles. Cure under the lamp. Repeat this step for a second coat to achieve an even and opaque color.
Step 3: Apply the Top Coat
Apply a thin layer of top coat to seal the gel polish and add shine. Make sure to cap the free edge to prevent chipping. Cure under the lamp. After curing, wipe off the tacky layer with a lint-free wipe soaked in rubbing alcohol.
Tips for a Long-Lasting Gel Manicure
- Avoid Water: Do not soak your nails in water before applying gel polish, as this can cause the nails to expand and contract, leading to lifting and chipping.
- Thin Layers: Apply gel polish in thin layers to prevent bubbling and ensure even curing.
- Consistent Products: Use products from the same brand for better compatibility and results.
- Proper Curing: Follow the curing times recommended by the gel polish manufacturer to ensure proper hardening of the polish.
Conclusion
Proper nail preparation is the foundation of a long-lasting and flawless gel polish manicure. By following these steps and using the right tools and products, you can achieve salon-quality results at home. Remember, taking the time to prep your nails correctly will pay off with a beautiful and durable manicure that lasts for weeks. Happy polishing!
FAQs
Do you have to rough up nails for gel polish?
Yes, it is essential to rough up or buff the nails before applying gel polish. This process helps create a slightly textured surface for the gel polish to adhere to properly. Buffing removes any oils, dirt, or debris from the nail plate, allowing for better adhesion and prolonging the wear of the gel manicure. Skipping this step can lead to premature chipping or peeling of the gel polish.
Do you need to prep gel nails?
Absolutely, proper nail preparation is crucial for achieving a long-lasting and flawless gel manicure. The prep process includes steps like pushing back cuticles, filing and shaping the nails, buffing the nail surface, and dehydrating the nails with a dehydrator or alcohol-based solution. These steps ensure that the gel polish adheres properly and doesn’t lift or peel prematurely. Skipping nail prep can lead to poor adhesion and a shorter lifespan for your gel manicure.
What to apply before gel nail polish?
Before applying gel nail polish, you should first apply a base coat specifically formulated for gel manicures. The base coat serves as a protective layer between the natural nail and the colored gel polish, preventing staining and promoting better adhesion. It also helps fill in any ridges or imperfections on the nail surface, creating a smooth canvas for the gel polish to adhere to evenly. Applying a base coat is an essential step for achieving a long-lasting and flawless gel manicure.
How to remove dead skin from nails before applying gel polish?
To remove dead skin from the nails before applying gel polish, you can use a cuticle pusher or an orangewood stick to gently push back the cuticles and remove any excess skin or debris. You can also use a fine-grit nail buffer or file to lightly buff the nail surface, which will help remove any dead skin cells or rough patches. Be careful not to over-buff, as this can thin out and weaken the natural nail. After buffing, use a lint-free wipe or cotton pad soaked in an alcohol-based solution to thoroughly cleanse the nail plate and remove any remaining dust or oils.
What is the importance of applying a base coat before gel polish?
Applying a base coat before gel polish is an essential step for several reasons. Firstly, it acts as a protective barrier between the natural nail and the colored gel polish, preventing staining and discoloration. Secondly, it helps fill in any ridges or imperfections on the nail surface, creating a smooth canvas for the gel polish to adhere to evenly. This promotes better adhesion and prevents premature chipping or peeling. Additionally, some base coats contain nourishing ingredients that can help strengthen and condition the natural nails. Overall, using a base coat is crucial for achieving a long-lasting, flawless, and healthy gel manicure.
