Last Updated on June 18, 2025
Hanging floating shelves without nails can be done by using adhesive strips or brackets for support. These alternatives are flexible, sturdy, and easy to install, making them a popular choice for homeowners who prefer not to use nails on their walls.
Floating shelves are an excellent way to create additional shelf space in your home without making it look cluttered. When installed correctly, they can hold heavier objects like books and decorative items, improving the overall look of the room. With the use of adhesive strips or brackets, you won’t need to worry about damaging the wall or requiring significant effort to remove the shelves. This article will go over some of the ways you can hang floating shelves without nails and the different materials you can use for support. By the end of the article, you’ll have a better idea of which method will work best for your needs.

Credit: www.canvasdiscount.com
Understanding Floating Shelves
Floating shelves are an excellent way to save some space while keeping things organized. These shelves differ from traditional ones in many ways as they don’t have any visible brackets or supports. Instead, they appear to “float” on your walls.
The trick lies in how they’re installed. Rather than relying on nails or screws, floating shelves have a hidden bracket system. This makes them unique and popular among homeowners as they offer a clean and sleek look. Additionally, they can be installed easily, and you can customize them to fit your specific needs.
So, if you’re looking for an affordable and trendy shelving solution, floating shelves are undoubtedly a perfect option.
Tools You Will Need
To hang floating shelves without nails, you’ll need a few tools. First, get a stud finder to locate studs in the wall. Use a level to ensure your shelves are straight. For a clean finish, a wood filler is used to fill up any gaps and sandpaper to smooth it out.
Install bracket anchors for additional support and hang your shelves without nails. A drill with a screwdriver bit is needed for attaching the brackets to the wall and the shelf to the bracket. A measuring tape is also needed to make sure everything fits perfectly.
Lastly, you’ll need a pencil to make markings on the wall to keep everything in place before installing. These tools are necessary to ensure a sturdy and secure installation of your floating shelves.
Alternative Methods For Hanging Floating Shelves
Hanging floating shelves without nails may seem difficult, but it’s actually pretty simple. Adhesive strips, for example, allow shelves to stick directly to the wall without any need for nails or screws. These strips offer a quick and easy solution that doesn’t damage your walls.
However, they may not be as strong as other methods and could struggle to hold heavier items. Brackets, on the other hand, are sturdier and can support more weight. Although they’re more secure, using brackets involves drilling holes in your wall, which can be less ideal for those who don’t want to leave permanent marks.
Each of these methods has its own pros and cons, so it’s always best to choose the one that makes the most sense for your specific situation.
Step-By-Step Guide To Hanging Floating Shelves Without Nails
Floating shelves are great for adding storage space and decoration to your walls. Hanging them without nails seems like a daunting task, but it’s really quite simple. First, gather your materials: a pencil, a level, wall anchors, screws or brackets, and a drill.
Measure and mark where you want the shelves to go, ensuring they’re level. Drill holes for the wall anchors, insert them, and attach your brackets or screws. Make sure they’re securely attached to the wall. Slide your floating shelves onto the brackets or screws and ensure they’re level.
If your shelves tend to tilt down, use a small piece of velcro or double-sided tape underneath to keep them stable. Remember to avoid overloading your shelves, distribute weight evenly, and regularly check the stability of your installation.
Decorative Ideas For Floating Shelves
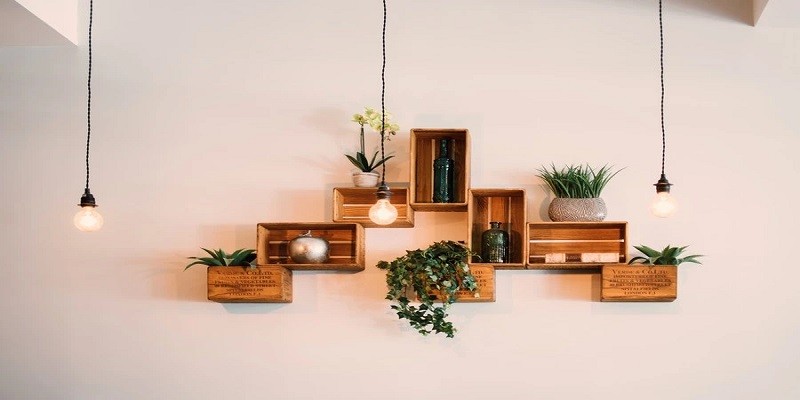
The beauty of floating shelves lies in their ability to stylishly hold items without visible support. Once installed, the fun starts as you get to decorate them with your treasured pieces. To create a visually appealing display, begin by incorporating varying elements such as books, plants, frames, and decorative items.
Consider adding pops of color or keeping a monochromatic scheme for a cohesive look. Play with height and depth for a dynamic effect. Group items in odd numbers for balance and interest. When styling, don’t overcrowd the shelves, but leave some spaces between items.
Following these tips, your floating shelves will be a beautiful addition to any space and a source of pride in diy home decor.
Maintenance Tips For Floating Shelves
Floating shelves are a beautiful and practical addition to any home. Once they are installed, it is essential to maintain them to keep them looking their best for years to come. One tip is to avoid placing heavy items on the shelves to prevent sagging and damage.
It’s also important to dust them regularly, using a soft cloth to avoid scratching the surface. To remove tougher stains or marks, use a mild cleaning solution, but avoid applying too much water. Another key aspect of maintenance is to check the brackets holding the shelves in place periodically.
Ensure they are secure and tighten any loose screws. With proper care, your floating shelves can maintain their elegant aesthetic and functionality for years to come.
Frequently Asked Questions Of How To Hang Floating Shelves Without Nails?
1. Can Floating Shelves Hold Heavy Objects?
Floating shelves can hold heavy objects as long as they are securely installed and the weight is evenly distributed.
2. What Tools Do I Need To Hang Floating Shelves Without Nails?
You will need a drill, screws, anchors, a level, and a stud finder (optional but helpful).
3. How Do I Find The Right Spot To Install The Floating Shelves?
Use a stud finder to locate the studs in the wall where you want to hang the shelves. Mark the spots with a pencil and use a level to ensure they are even.
4. Can I Use Adhesive Strips Instead Of Screws To Hang Floating Shelves?
While adhesive strips can be used to hang lightweight items, they are not recommended for floating shelves as they may not provide enough support.
5. How Do I Ensure My Floating Shelves Are Level?
Use a level to ensure the brackets are level before attaching the shelf. Double-check with a level after installing the shelf as well.
Conclusion
Overall, hanging floating shelves without nails may seem like a daunting task, but it is definitely achievable with the right tools and patience. There are a variety of methods available; from using adhesive strips to using anchors and screws. When selecting the right method to use, consider the weight of the shelf and its contents.
Also, make sure to read and follow the manufacturer’s instructions carefully. Remember that safety should always be a top priority when it comes to any diy project, so take your time and be thorough. By following the tips outlined in this guide, you can successfully hang your floating shelves without nails and elevate your home decor.
So go ahead and give it a try – you might be surprised at how much of a difference a few floating shelves can make in your living space.
